
Electric screwdriver for furniture assembly: how to assemble flat-pack furniture without damage
Quick answer: Use a low-torque electric screwdriver for furniture assembly at its lowest torque setting, start screws by hand, hold the tool straight, and stop as soon as each screw is snug. Fit dowels and cam locks by hand first, tighten joints evenly, check the piece is square before final tightening, and finish important joints by hand to avoid splitting or stripping particleboard and MDF.
An electric screwdriver for furniture assembly can turn a long, tiring job into a quick one, but only if you use it the right way. Flat-pack furniture is made from particleboard, MDF, and other materials that split, strip, and crack easily if you over-tighten a screw or drive it at the wrong angle. A low-torque electric screwdriver, used slowly and carefully, can drive the many screws in a wardrobe, bed, desk, or bookshelf quickly and evenly, with less strain on your wrist than a manual tool.
This guide explains how to use an electric screwdriver for furniture assembly, what settings to use, how to handle cam locks and dowels, and how to avoid the damage that ruins flat-pack furniture. It is written for beginners and for people who assemble furniture regularly.
If you are new to the tool itself, start with our guide on how to use an electric screwdriver, which covers the basic steps, torque settings, and safety habits.
Why furniture assembly needs a gentle touch
Flat-pack furniture is different from solid wood furniture. It is usually made from particleboard or MDF, which are made from wood fibres glued together. These materials are strong enough for furniture, but they do not hold screws as well as solid wood, and they split easily if a screw is over-tightened or driven too close to the edge.
Most flat-pack furniture uses a mix of screws, cam locks, dowels, and bolts. Cam locks are small metal discs that turn to lock a bolt in place. Dowels are small wooden pegs that line up the parts. Screws hold panels together and fix hinges, drawer runners, and backs.
An electric screwdriver can help with all of these, but it can also damage them quickly. A screw driven too far can strip the hole, so it will not hold again. A cam lock turned too far can crack the panel. A dowel forced in at an angle can split the board.
The safest approach is to use the electric screwdriver at a low torque setting, drive screws slowly, and finish the last part by hand when a joint needs a precise, snug fit. Take your time, and check the instructions at each step.
What to look for in an electric screwdriver for furniture assembly
Not every electric screwdriver suits furniture assembly. A large, powerful tool made for heavy DIY is the wrong choice. Look for these features instead:
Low and adjustable torque
This is the most important feature. The tool should have a low torque setting, ideally with several small steps, so you can stop the screw before it strips the hole or cracks the panel. Start at the lowest setting and increase it only if a screw stops before it is snug. If your tool has only a high setting, use a manual screwdriver instead for furniture.
A comfortable grip and light weight
Furniture assembly takes time, and you will hold the tool for a long while. A light tool with a comfortable grip is easier to control and less tiring. A heavy tool is harder to hold straight, especially when you are working at an angle or inside a wardrobe.
Variable speed and a gentle start
The tool should start slowly when you press the trigger, so the bit can seat in the screw head before it speeds up. A tool that jumps to full speed at once is more likely to slip and damage a screw or a panel.
The right bits
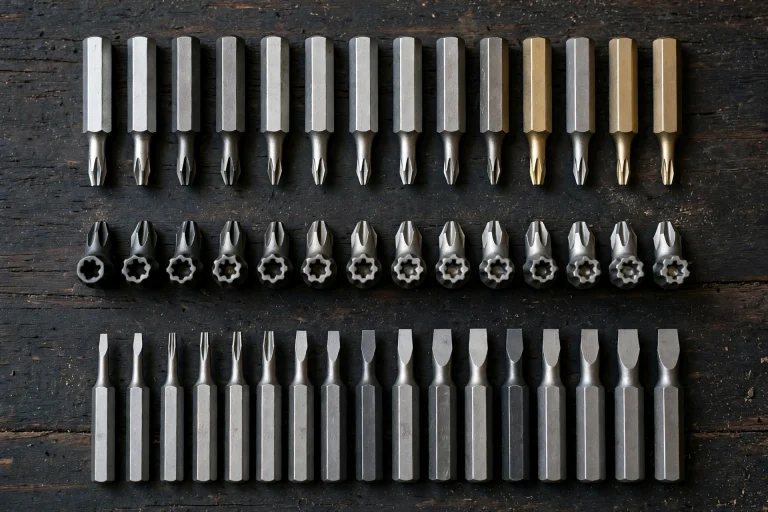
Flat-pack furniture usually uses phillips and pozidriv screws, and sometimes hex bolts. Make sure your tool comes with, or accepts, bits in the sizes you need, usually PH2 and PZ2 for most furniture, and hex bits for some bolts. The bits should fit the screw heads exactly. For more on bit types, see our guide to electric screwdriver bits.
A small light
A small light on the tool helps you see the screw head inside a dark wardrobe or under a desk, where shadows can hide the screw. This is a small feature, but it makes a real difference when you are working in a tight space.
How to use an electric screwdriver for furniture assembly step by step
Follow these steps in order. Work slowly, especially on your first piece of furniture, and check the instructions at each stage.
Step 1: Read the instructions and sort the parts
Before you switch the tool on, read the assembly instructions all the way through. Check that you have all the parts and all the screws, bolts, dowels, and cam locks. Sort them into small trays or piles, so you do not mix them up. A screw used in the wrong place can damage a panel or leave a joint weak.
Lay out the panels on a clean, flat surface, such as a rug, a blanket, or a large piece of cardboard. This stops the panels from getting scratched on a hard floor. Keep the instructions nearby, so you can check them at each step.
Step 2: Fit dowels and cam locks by hand
Dowels and cam locks should be fitted by hand first. Push dowels into their holes gently, with your fingers or a soft mallet. Do not hammer them in hard, or they can split the board. Fit cam locks into their holes and turn them by hand to check that they move freely.
If a dowel will not go in, check that it is the right size and that the hole is clean. Do not force it with the electric tool. A dowel that is forced in at an angle can split the panel.
Step 3: Start screws by hand
Start each screw by hand, turning it a few times with your fingers or a manual screwdriver, so you know it is threaded correctly. A screw that is cross-threaded will feel stiff and uneven. If it does, stop, remove it, and start again. Do not force it with the electric tool.
This step is especially important for screws in particleboard, where a screw that is started at an angle can strip the hole and never hold properly again.
Step 4: Drive screws with the electric screwdriver at low torque
Once the screws are started by hand, use the electric screwdriver at the lowest torque setting to drive them in. Hold the tool straight, in line with the screw, and start slowly. Let the bit seat in the screw head before you increase the speed.
Drive each screw until it is snug, then stop. Do not tighten one screw fully before you start the others. Tighten the joints evenly, a little at a time, so the piece stays square. This is especially important for wardrobes, beds, and bookshelves, which can twist out of shape if one side is tightened before the other.
For cam locks, turn them with a manual screwdriver or with the electric tool at the lowest setting, and stop as soon as the lock is snug. A cam lock turned too far can crack the panel around it.
Step 5: Check the piece is square before final tightening
Before you tighten the last screws fully, check that the piece is square. Measure the diagonals from corner to corner. If they are the same length, the piece is square. If they are different, loosen the screws slightly, adjust the piece, and tighten them again evenly.
This step is easy to skip, but it matters. A wardrobe or bookshelf that is not square will not close properly, and the doors and drawers will not fit.
Step 6: Fit the back panel, hinges, and drawer runners
The back panel, usually a thin sheet of hardboard, helps keep the piece square. Fix it with the small nails or screws supplied, and check that the piece is still square after you fit it.
Hinges and drawer runners need to be fitted carefully, so doors and drawers open and close smoothly. Use the electric screwdriver at low torque for the screws, and check the fit before you tighten them fully. If a door does not close properly, loosen the hinge screws slightly, adjust the door, and tighten them again.
Step 7: Finish the last turn by hand
For the final turn on important joints, use a manual screwdriver. This gives you more feel for when the screw is tight enough without over-tightening it. A manual turn is also useful for cam locks, where a small turn makes a big difference to how tight the joint is.
Comparison table: electric screwdriver vs manual screwdriver for furniture assembly
| Task | Electric screwdriver | Manual screwdriver | Best choice |
|---|---|---|---|
| Driving many screws | Yes, low torque, slow speed | Yes, slower and tiring | Electric for speed |
| Cam locks | Yes, lowest torque only | Yes, more control | Manual for control |
| Dowels | No, fit by hand | Yes | Manual only |
| Final tightening | Yes, low torque | Yes, more feel | Manual for precision |
| Hinges and runners | Yes, low torque | Yes, more control | Electric, then check by hand |
| Back panel | Yes, low torque | Yes | Electric for speed |
This table is a general guide. Always check the instructions for your furniture, and use the tool that gives you the most control for each joint.
Frequently asked questions
Can I use an electric screwdriver for flat-pack furniture?
Yes, if it has a low torque setting and you use it carefully. Use the lowest torque, start screws by hand, hold the tool straight, and stop as soon as the screw is snug. Finish important joints by hand.
What torque setting should I use for furniture assembly?
Use the lowest torque setting to start, and increase it only if a screw stops before it is snug. A low setting is safer for particleboard and MDF, which split and strip easily.
Why do screws strip in flat-pack furniture?
The most common causes are over-tightening, using the wrong bit, driving a screw at an angle, or starting a screw that is cross-threaded. Stop as soon as the screw is snug, match the bit exactly, hold the tool straight, and start screws by hand.
Should I use a drill for furniture assembly?
A drill is usually too powerful for flat-pack furniture. An electric screwdriver with low torque is a better choice, because it gives you more control and is less likely to strip a hole or crack a panel. For a full comparison, see our guide on electric screwdriver vs drill.
How do I stop a wardrobe from wobbling?
Check that the piece is square, tighten the joints evenly, and fix the back panel properly. If it still wobbles, check the floor is level, adjust the feet if the piece has them, and fix the piece to the wall with the strap supplied.
What do I do if a screw hole strips?
Stop tightening the screw. A stripped hole can sometimes be fixed with wood glue and a small dowel or matchstick, left to dry, then re-drilled. If the panel is cracked, it may need to be replaced. Check the maker guidance or contact the shop where you bought the furniture.
Conclusion
An electric screwdriver for furniture assembly is a useful tool when it is used gently and carefully. A low-torque tool can drive the many screws in flat-pack furniture quickly and evenly, with less strain on your wrist than a manual tool. A powerful tool used carelessly can strip holes, crack panels, and ruin a piece of furniture in seconds.
The safest approach is to read the instructions, sort the parts, start screws by hand, use the electric tool at the lowest torque setting, hold it straight, and finish important joints by hand. Check that the piece is square before you tighten the last screws, and fix tall furniture to the wall when you are done.
With those habits, furniture assembly becomes a quicker, easier job, and your furniture will last longer. For the basic steps, read our guide on how to use an electric screwdriver, and for the bits you will need, see our guide to electric screwdriver bits.